
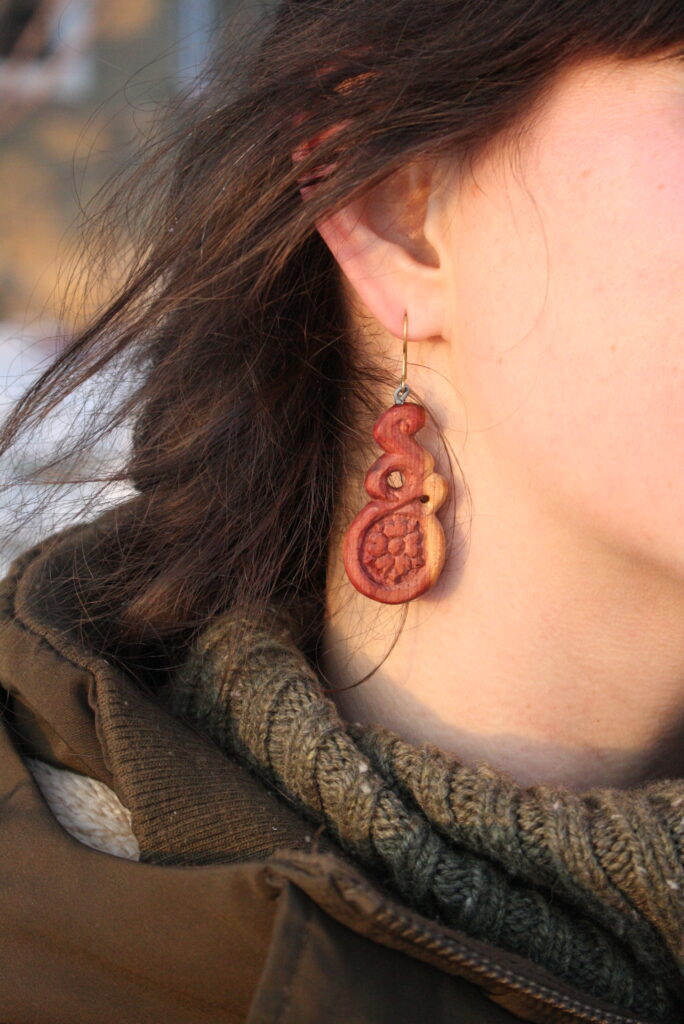
Wooden earrings are a great gift idea for the females in your life. The project can be as simple or as ornate as you wish–depending on your time allowance and your skill level. Here is how I made a pair for my wife.
I started wood carving as a teenager. First, it was spoons and then more complex objects. In my philosophy with wood carving, I always strive to create objects that have an actual purpose. Who knew that getting married would give me another reason to carve?
Selecting your Wood
For something as small and delicate as wooden earrings, it should be not too hard to find some suitable wood. Generally, I look for some wood with a beautiful grain to it. Such natural beauty does well to adorn the natural feminine beauty. For this project I selected juniper wood. Specifically it is juniperus virginiana–also known as Eastern Red Cedar. This tree grows abundantly amongst the rocky crags in my local area. This tree has many surprising uses in my homestead. Read more about that here.
The most attractive aspects of juniper would is its gorgeous red heartwood. Also, as a conifer, the wood is light and easy to carve.

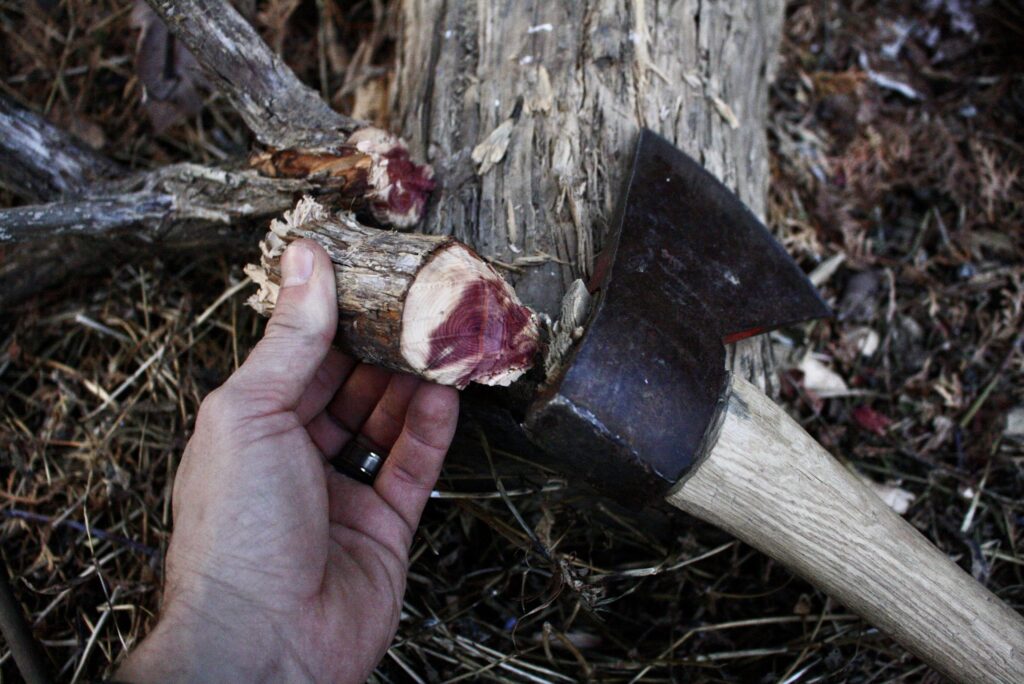
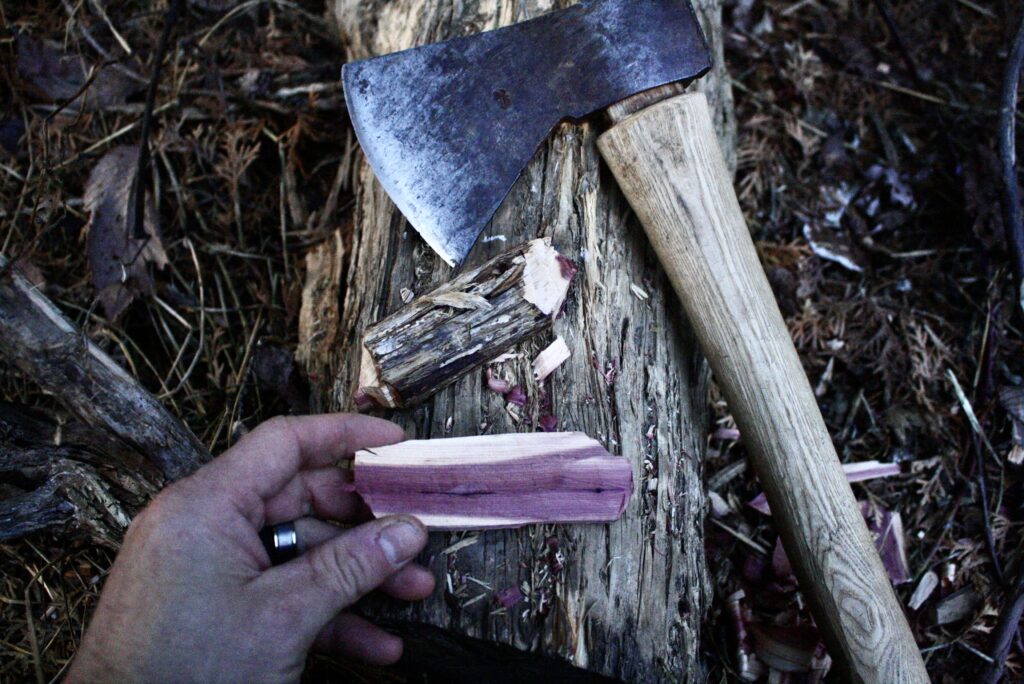
For this project, just a small section from a limb is all that is needed. Just look at that wood! One needs an excuse to make something out such beautiful wood.
Split the section with your trusty axe. Then, rough out the size and thickness. Leave room for fine carving and sanding down to final thickness–about 1/4 inch. It is also helpful to leave it long to give your self a good grip for carving such a small piece
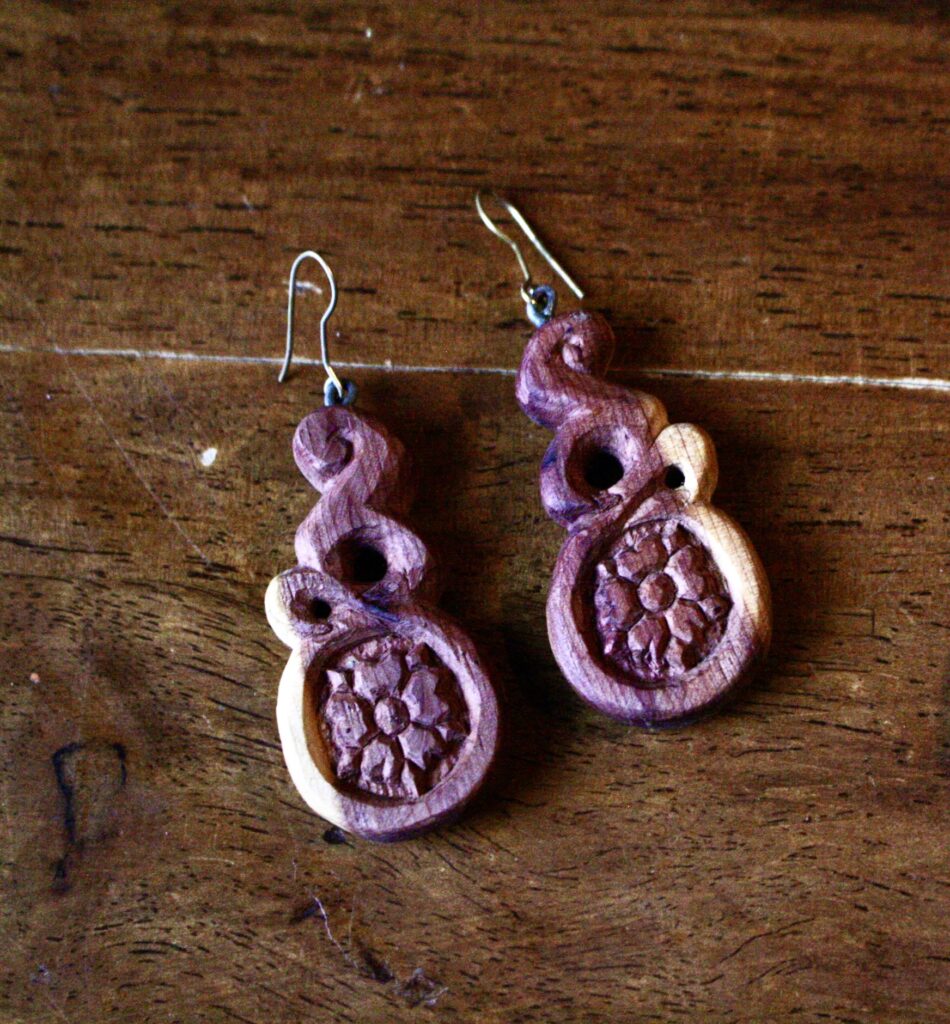
Earring Design
Unsurprisingly, my artistic style draws great inspiration from traditional folk, Nordic and Mediaeval art. Therefore, a lot of serpentine, knot, and vine motifs. This particular project incorporates the heraldic rose. This was a popular symbol and motif in the mediaeval period and was often used in coats-of-arms.
Carving Process
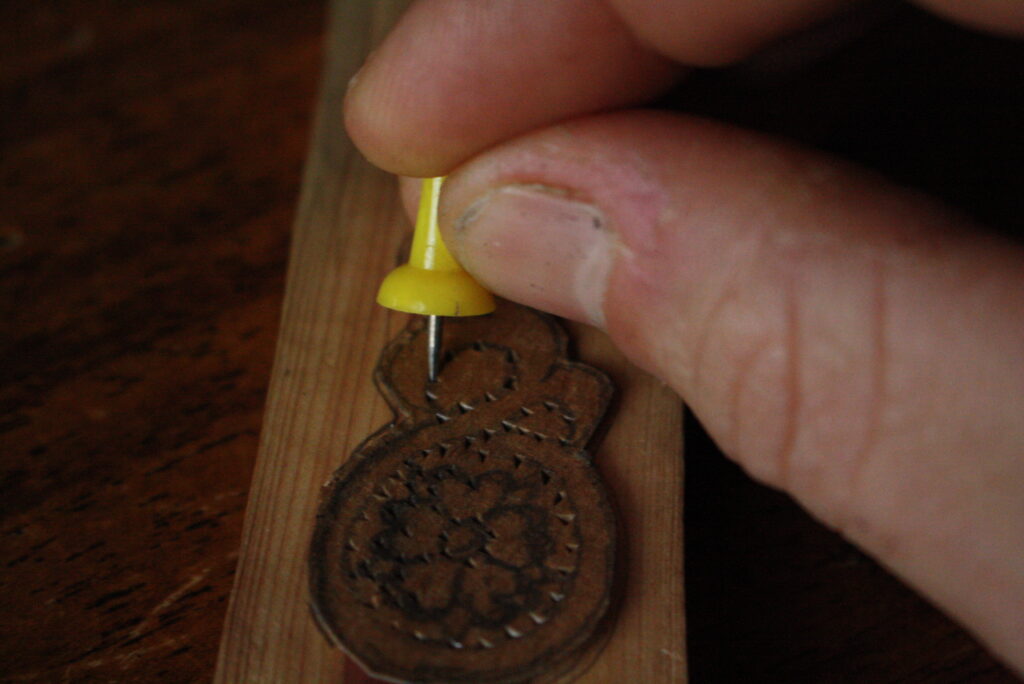
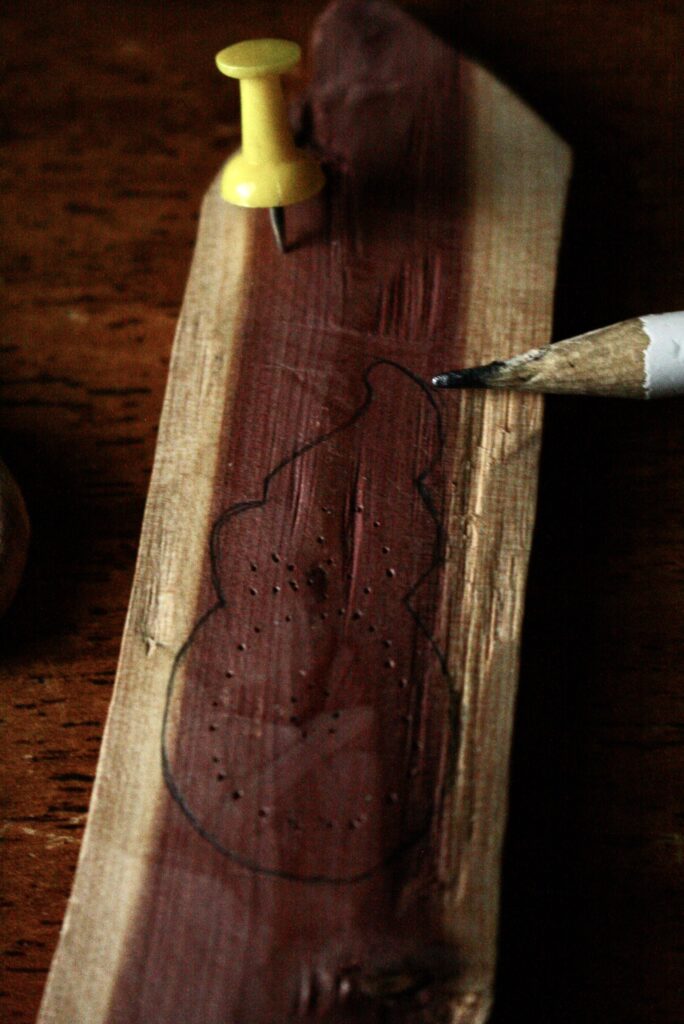
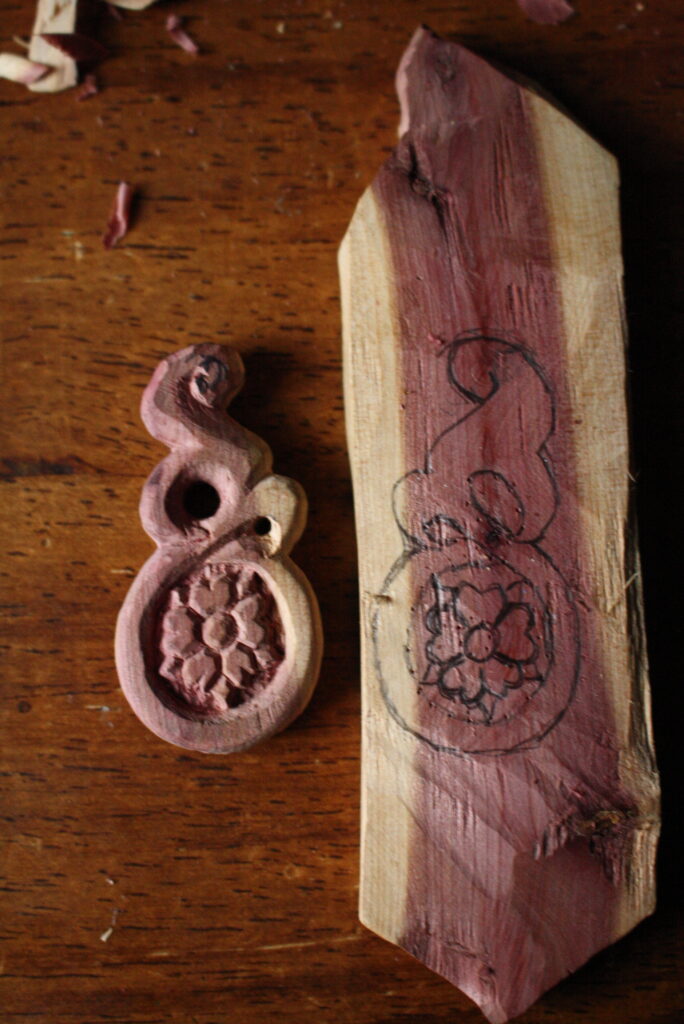
Here is the trick to get an exact symmetry for both earrings: Draw your design on a piece of cardboard. Use this as your template to trace onto both pieces of wood.
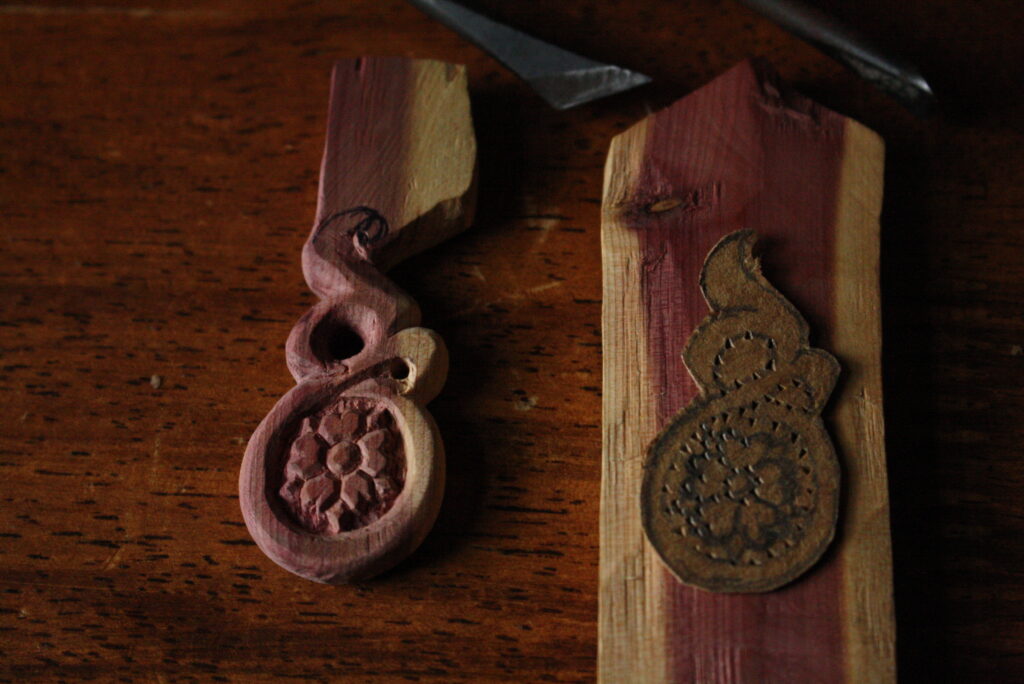
Now, use a thumbtack to poke holes through the template along the inner design into the wood. This will give you a pattern of dots to connect and thus an exact copy of the design on the wood.
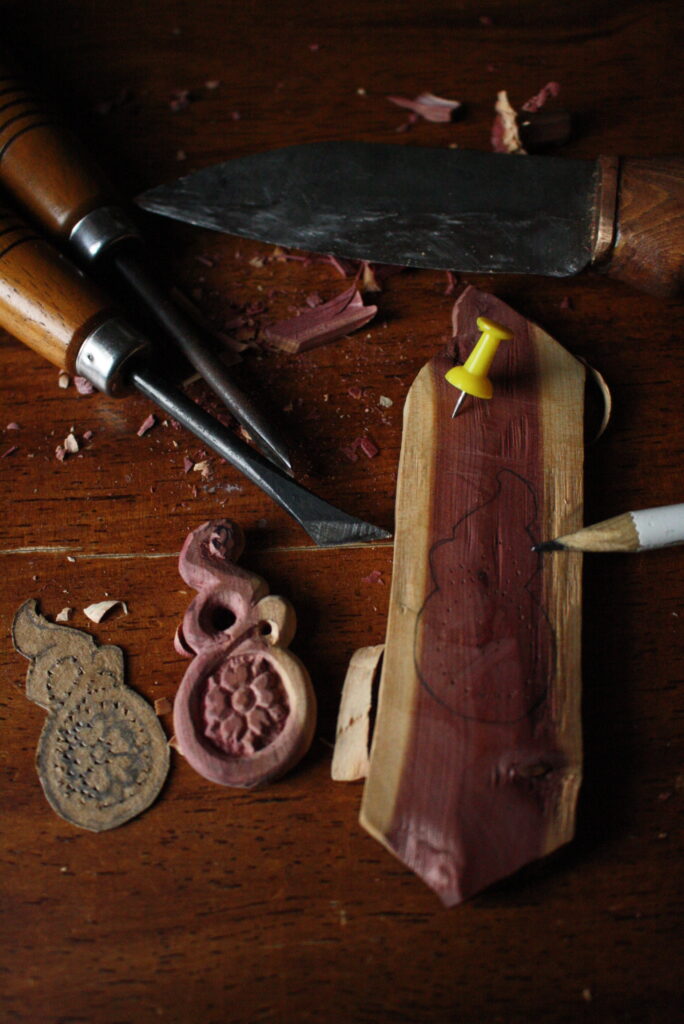
Below is an assemblage of tools used. My large, all-purpose knife is used for carving off the bulk wood and the exterior shape. The majority of fine carving–especially the interior design is done with a carving knife with a straight sharp point. If available, small gouge-knives are also helpful.
Learning to carve designs in wood is a process that takes time and experience. Honestly, it is its own subject. But, the single piece of advice I have is this: Always cut with the grain and never against it. That ensures smoothness and not gouging of the wood.
After this, finish the final shape with a fine-grit sandpaper. Lastly, apply three coats of polyurethane. This seals it up nicely.
Earring Hardware
With a fine drill bit, carefully bore a hole from the top of the earring. In this process, make sure that the hole is perfectly vertical. Now, cut a length of fine wire. Next, twist a loop at one end of the wire with needle-nose pliers and. Then, afix the wire in the hole so that the loop sits just on top of the wood. Secure the wire in the hole with superglue. Finally, attach the earring hooks to the earrings.
All done! Such a project as wooden earrings is a fine way to experiment in decorative artwork, I find. Hopefully, she likes it!
~ Nathanael

Leave a Reply