
So, you have made a wooden toy bow for your kids. Now you need some toy arrows. Again, though they may be only toys, I enjoy making them from scratch as it improves my practice in making arrows from myself. Mind, the first few times you fletch an arrow can be a bit fiddly. But the more you do it, the quicker and less fiddly it becomes. You can’t make too many arrows, so this a great way to practice. These toy arrows are a combination of natural and manufactured materials.
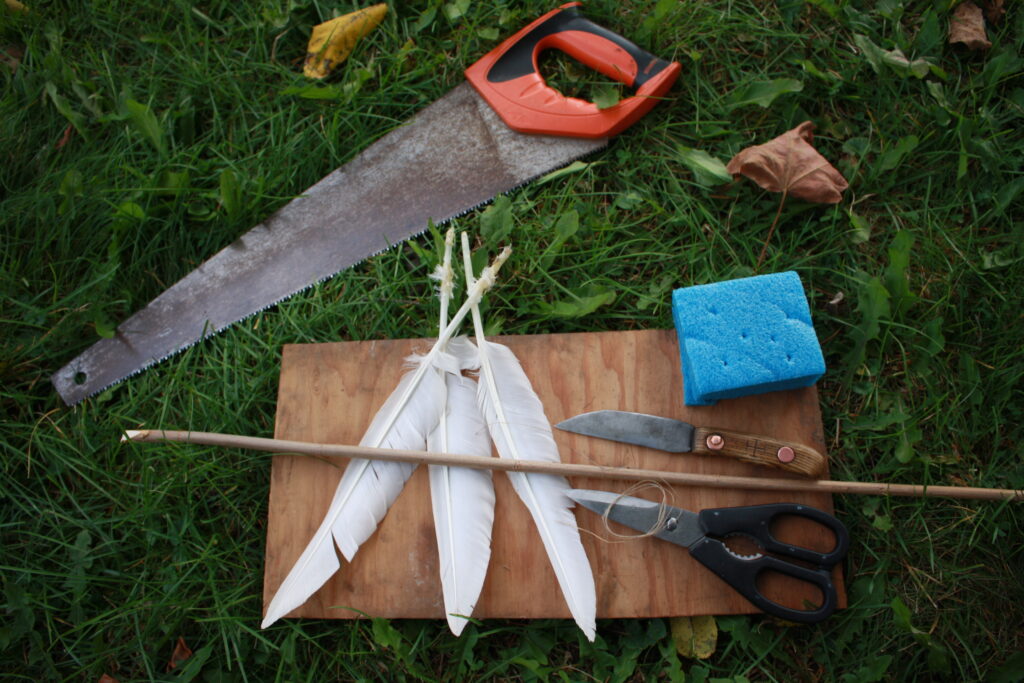
Here is a list of materials needed:
- wooden shaft about 10-12 inches.
- Feathers (Note: They should be from the same wing–that is, all from the left wing, or all from the right wing)
- length of fine carpet thread or sinew.
- superglue
- duct tape
- foam padding
Tools:
- sharp knife.
- scissors
- saw
Making the Arrow Shaft
Getting a straight wooden shaft for a toy arrow that is only 10-12 inches is a lot easier than a full sized arrow. Of course, you can buy quarter inch dowel from the hardware store. You can also harvest from the wild. Willow will provide you plenty of straight shoots for a toy arrow. Other woods used in the past cultures include hazel and varieties of the viburnum family. On a note of interest, the famous ice-mummy Ötzi who lived in the Middle Stone Age in the Alps had arrows made from the Viburnum opulus. I have a variety of viburnum growing next to my house, and it grows nice and straight shoots perfect for arrows.

Making Arrow Fletching
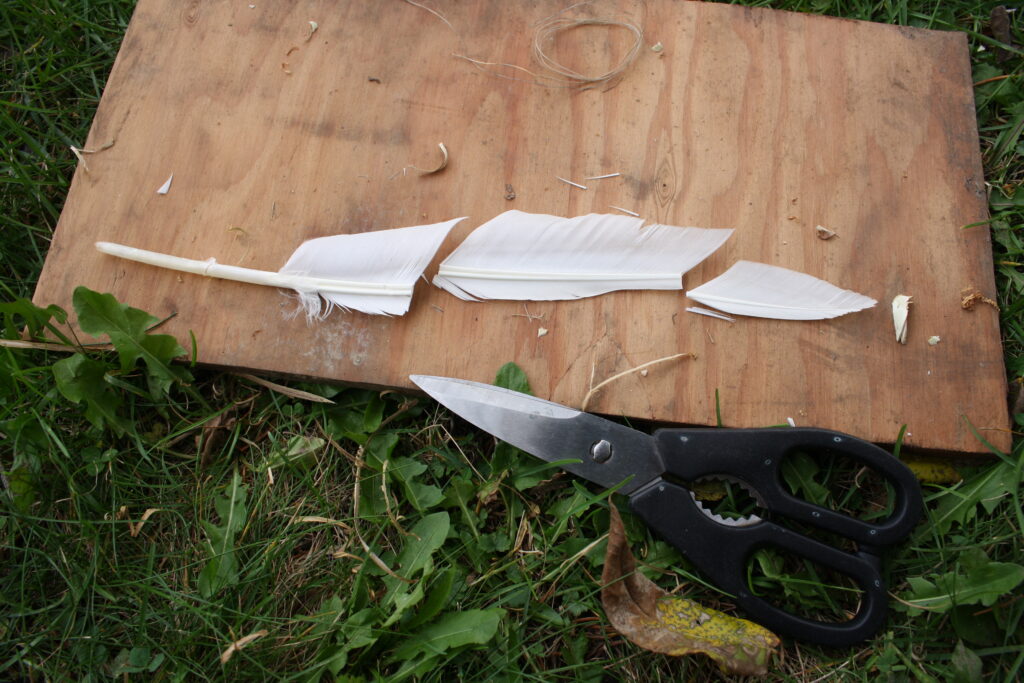
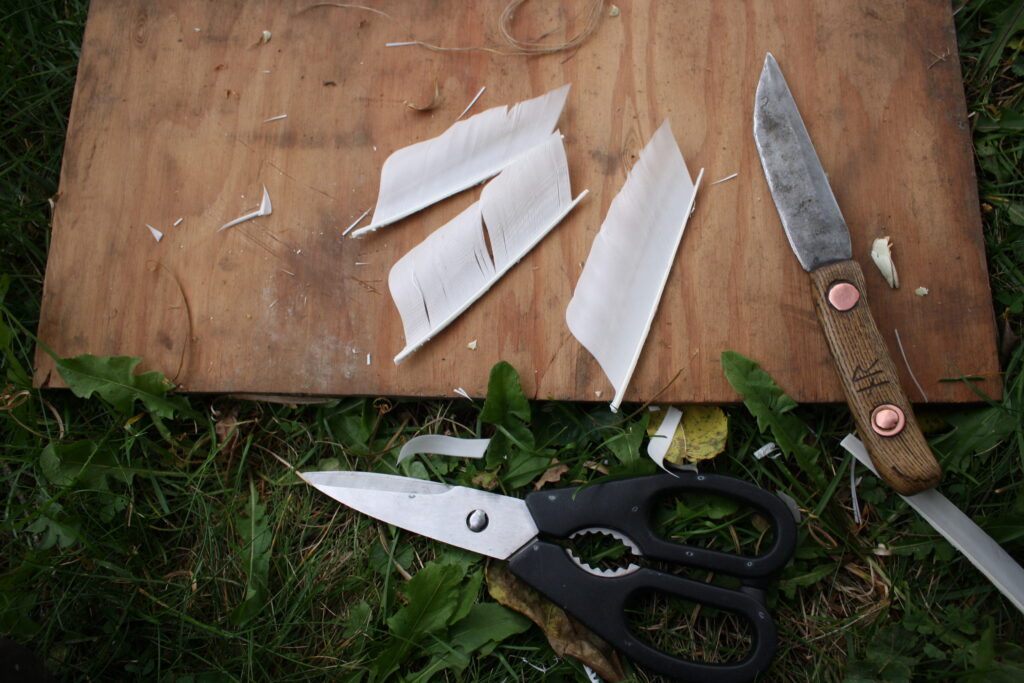
Make your fletchings by snipping both ends of the feather like so:
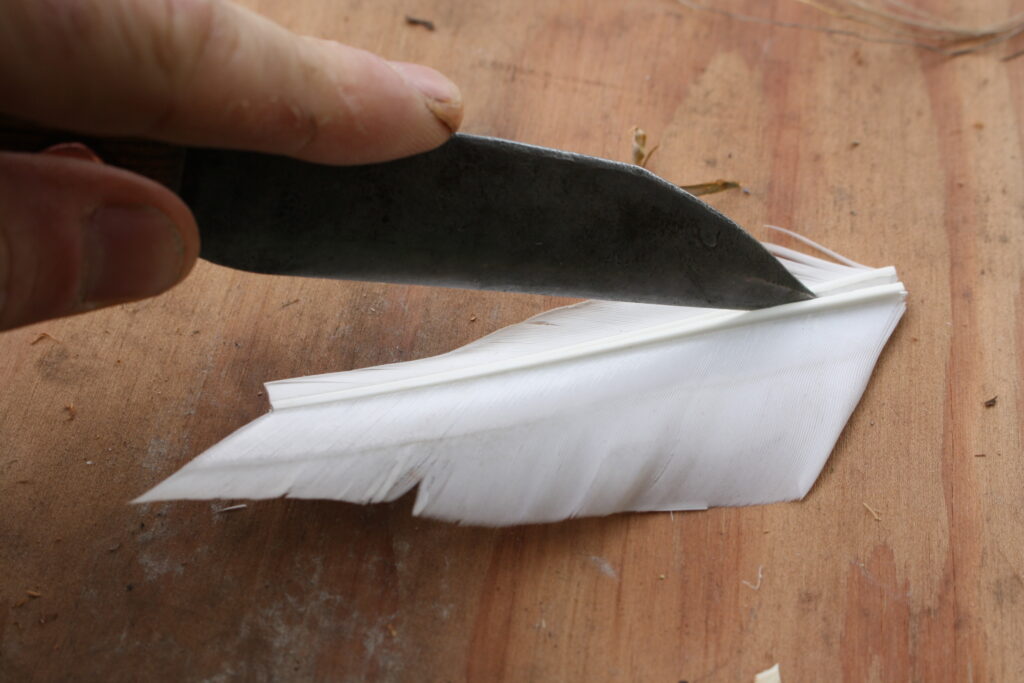
Next, take your knife and split down the the centre of the feather quill:
With the scissors, snip off a half inch of plumes off of either end of each fletching. Your prepared fletches should look thus.
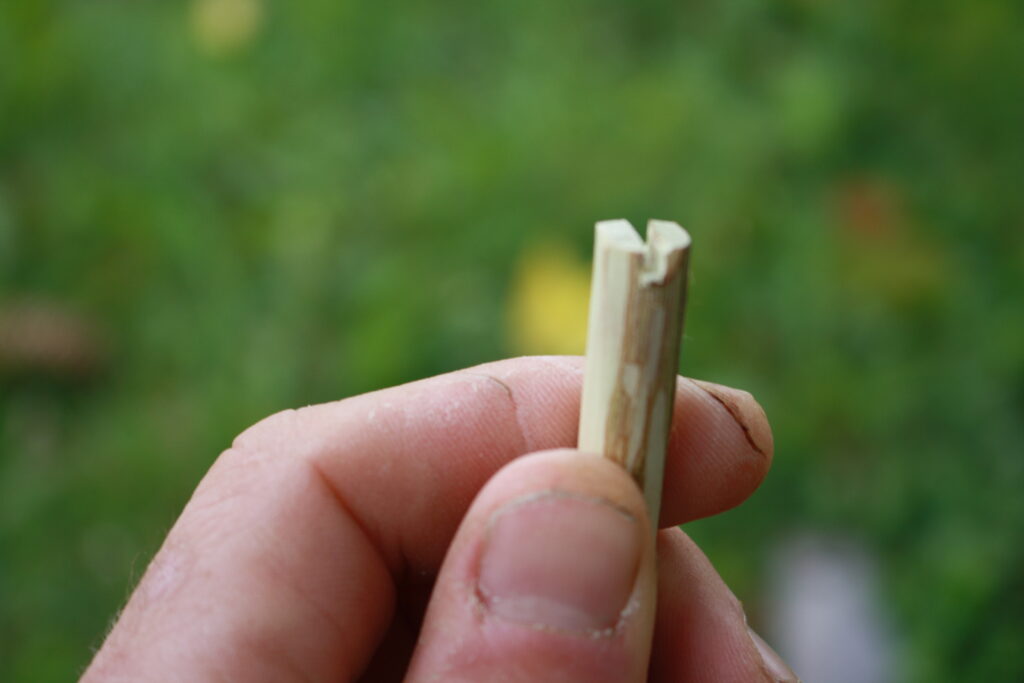
Make a nock on the end of the shaft using your saw and knife.
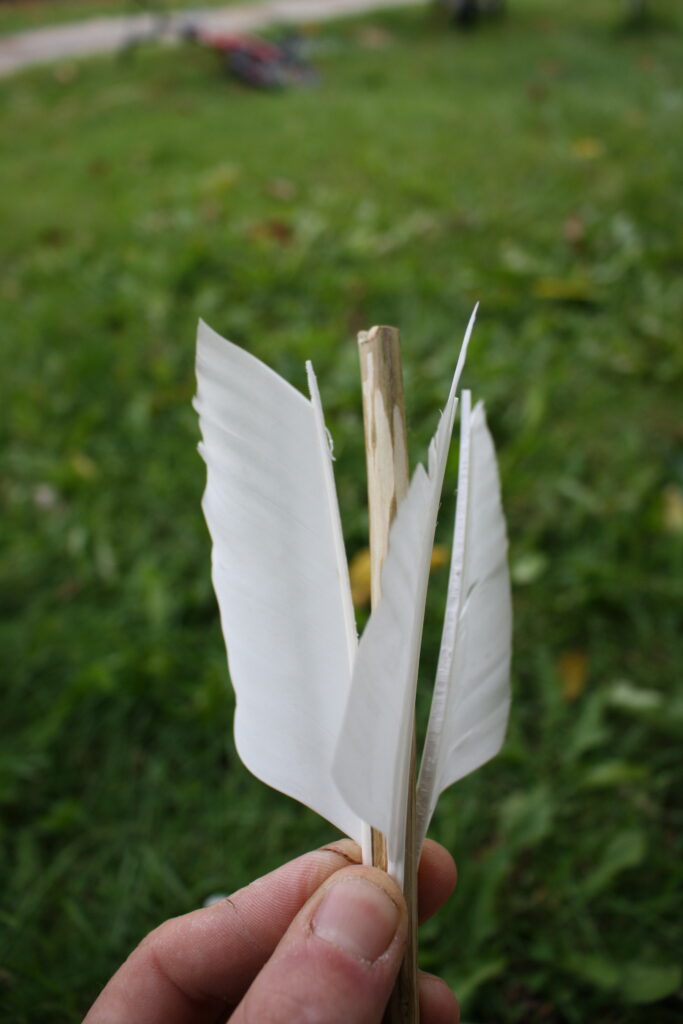
Now begins the tricky bit. Arrange your fletches more or less where they should go on the shaft. With your thumb and forefinger, hold them firmly in place. At this point, don’t worry about keeping them too exactly where they should go.
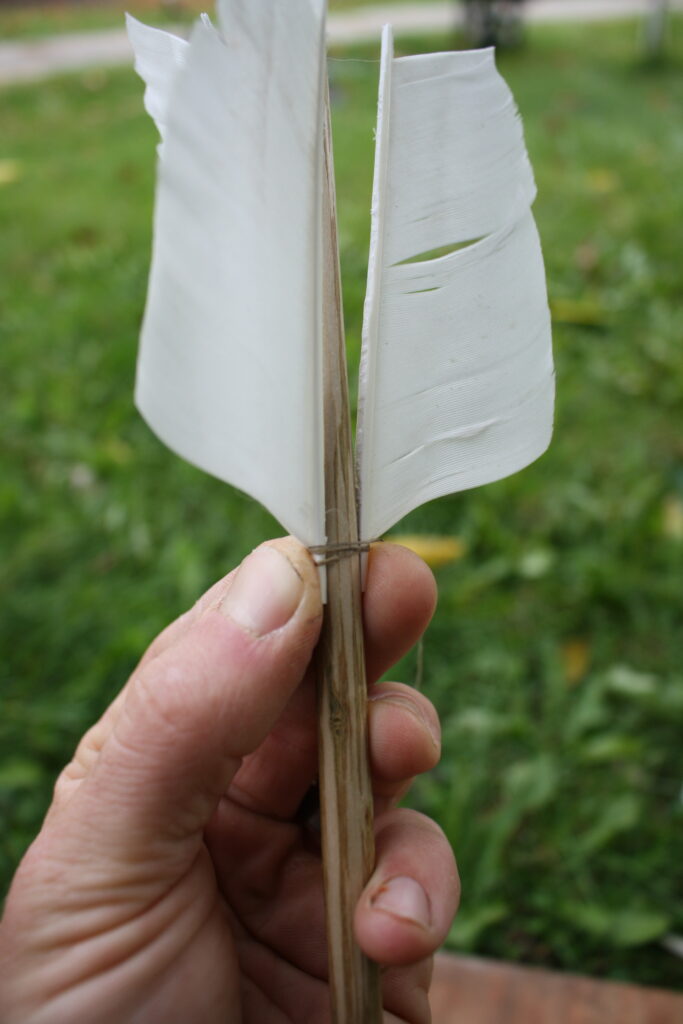
Now, take your thread and pinch it between your thumb and the fletching. Start to wrap the thread around several times. This will secure the ends of all the fletchings onto the shaft.
Now, gently part the feather fibers with your knife or a tooth-pick. This will create a gap through which you can fish your thread.
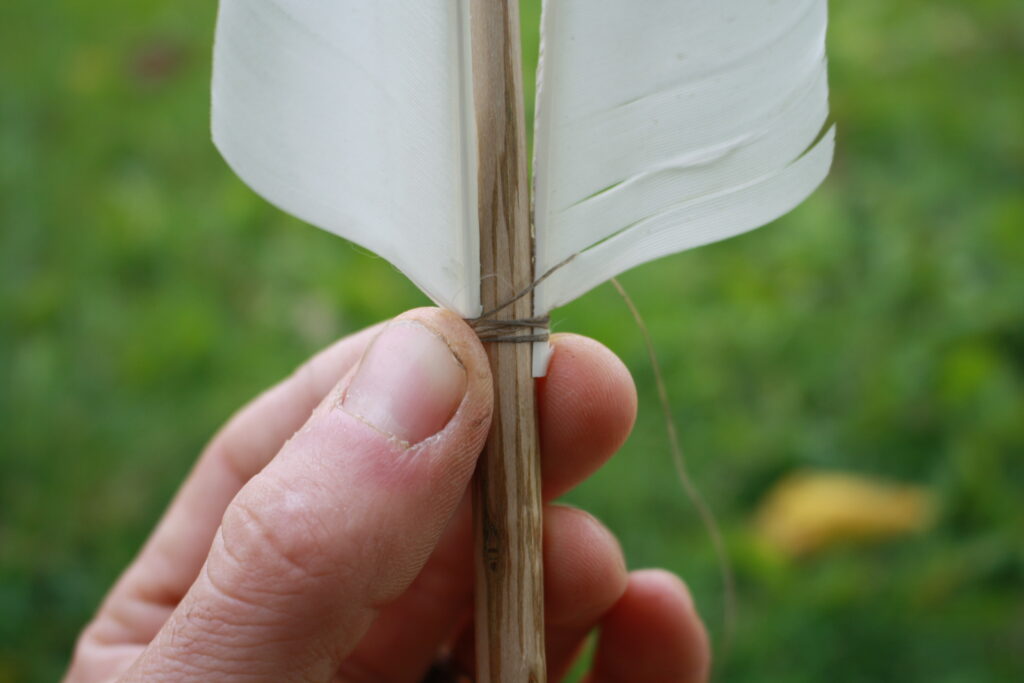
Continue this process as you start wrapping your thread around the shaft, working your way towards the arrow nock. Wrap the ends of the fletchings well and tie a knot in to secure the end of the thread.
At this point you can tweak the position of the fletches so that they are arranged evenly around the shaft.
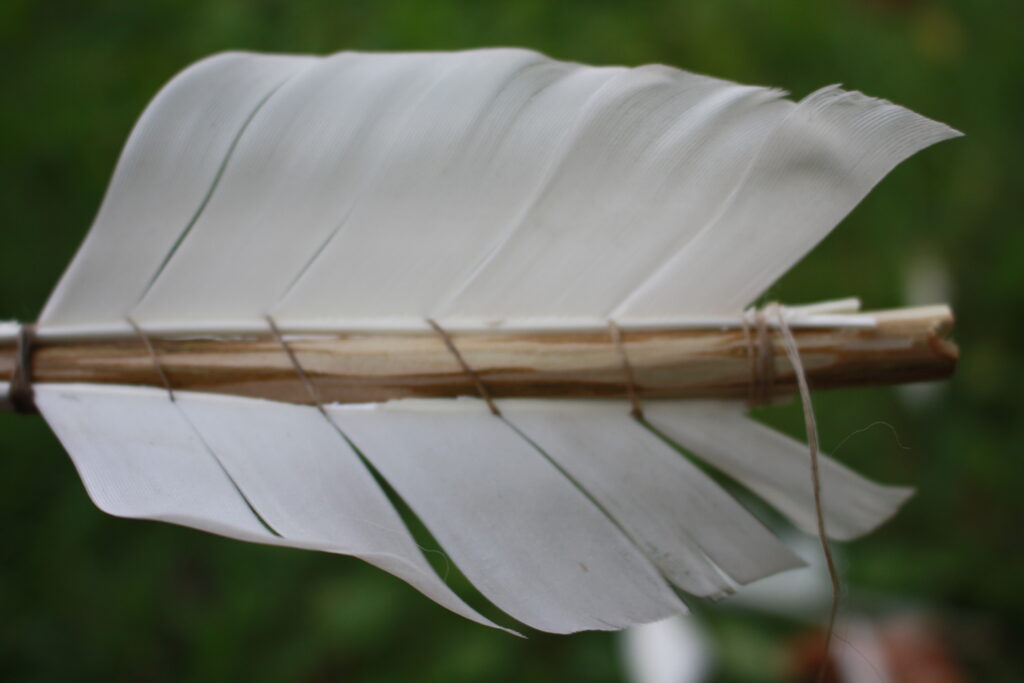
With the scissors, trim the fletches down to even size.

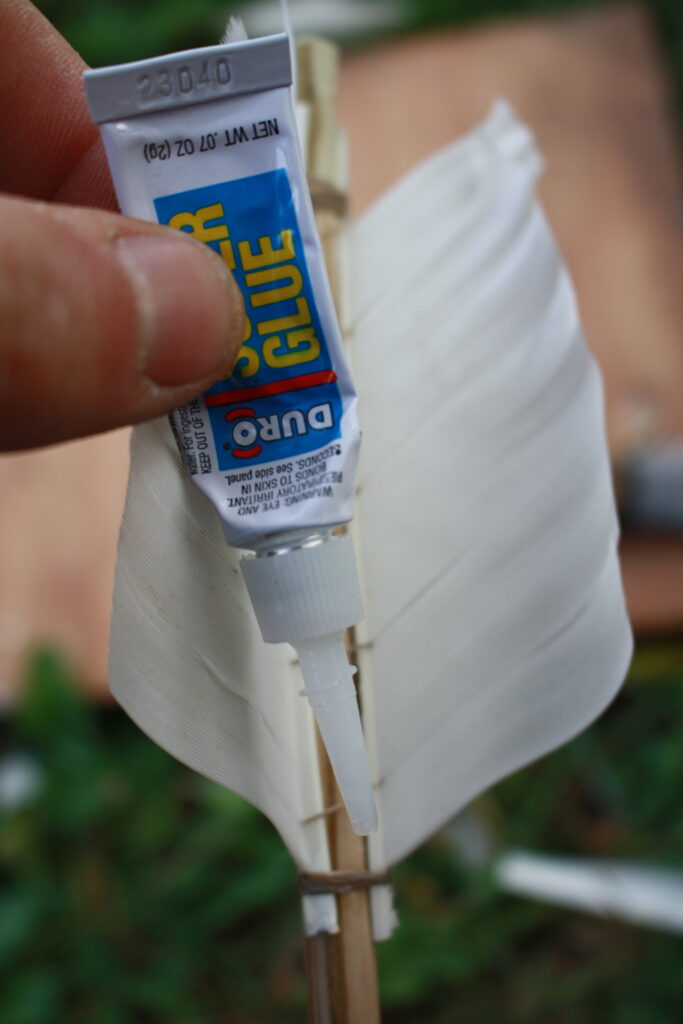
Now comes the cheater bit: apply super-glue around the fletchings and thread ends. This will secure everything in place. Adhesive is vital for making arrows and there were several glues in used in the centuries past. In the North, glue was usually made from either birch or pine tar mixed with charcoal. Hopefully that will be the subject of another post. But for now…superglue!
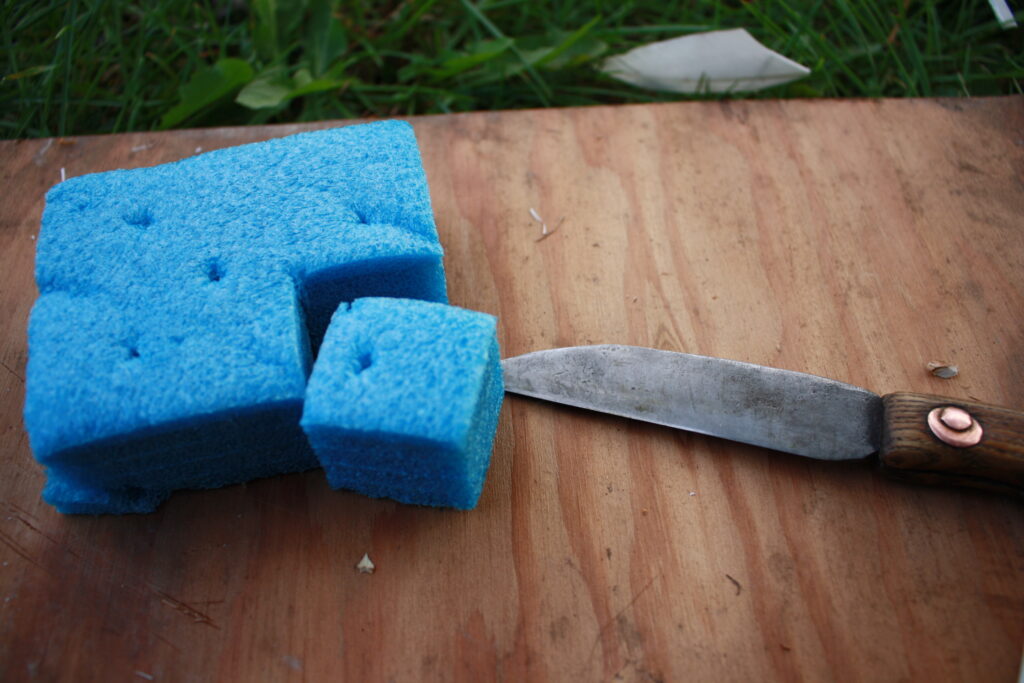
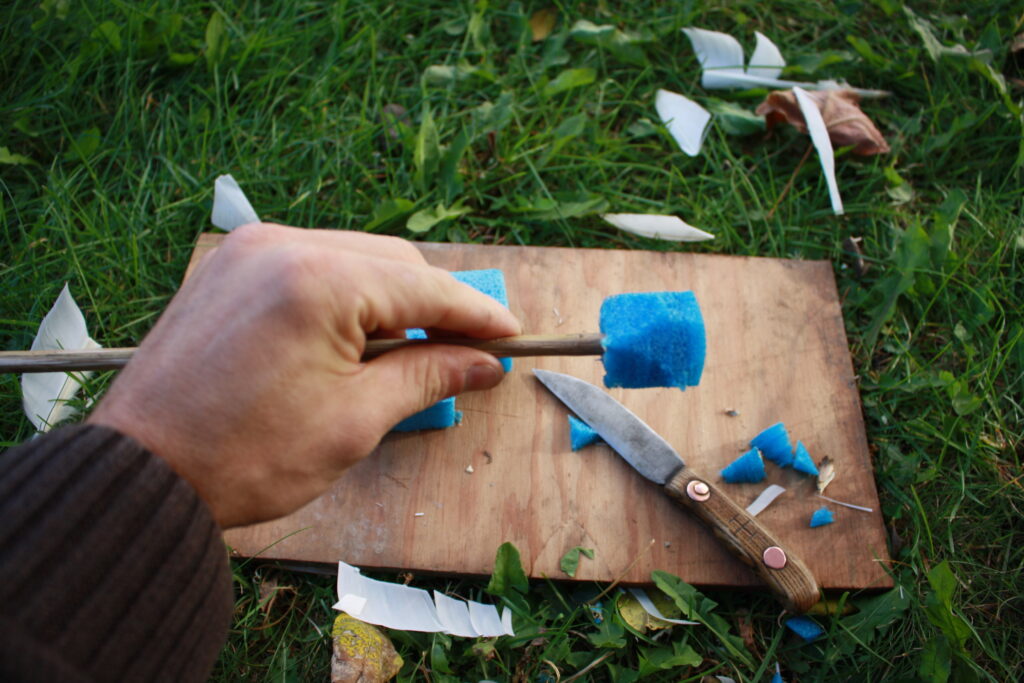
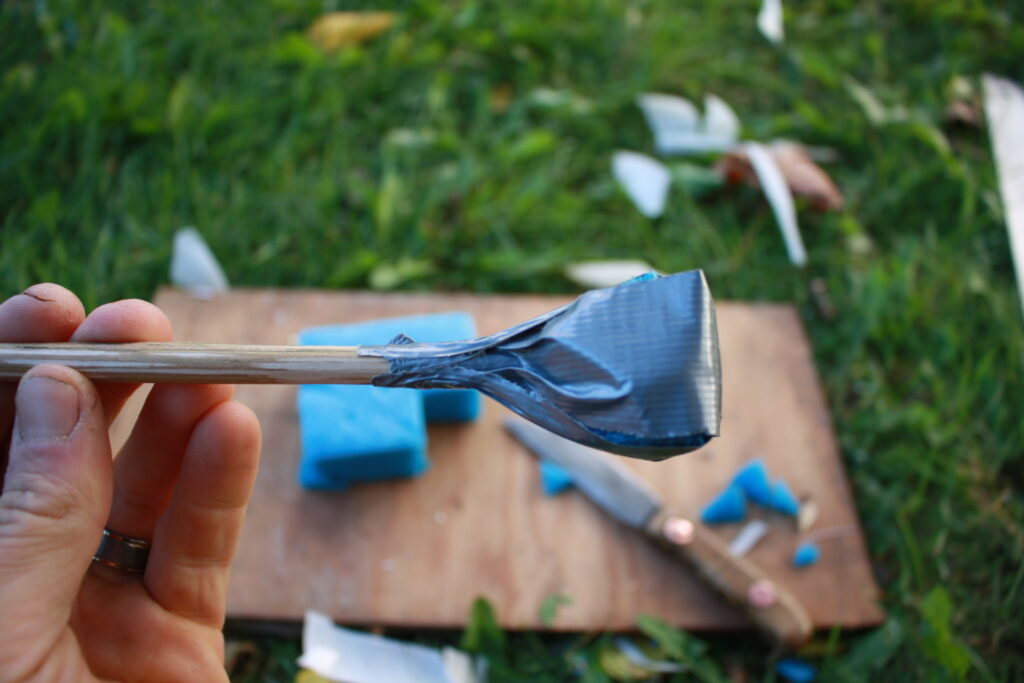
Making the Padded Tip
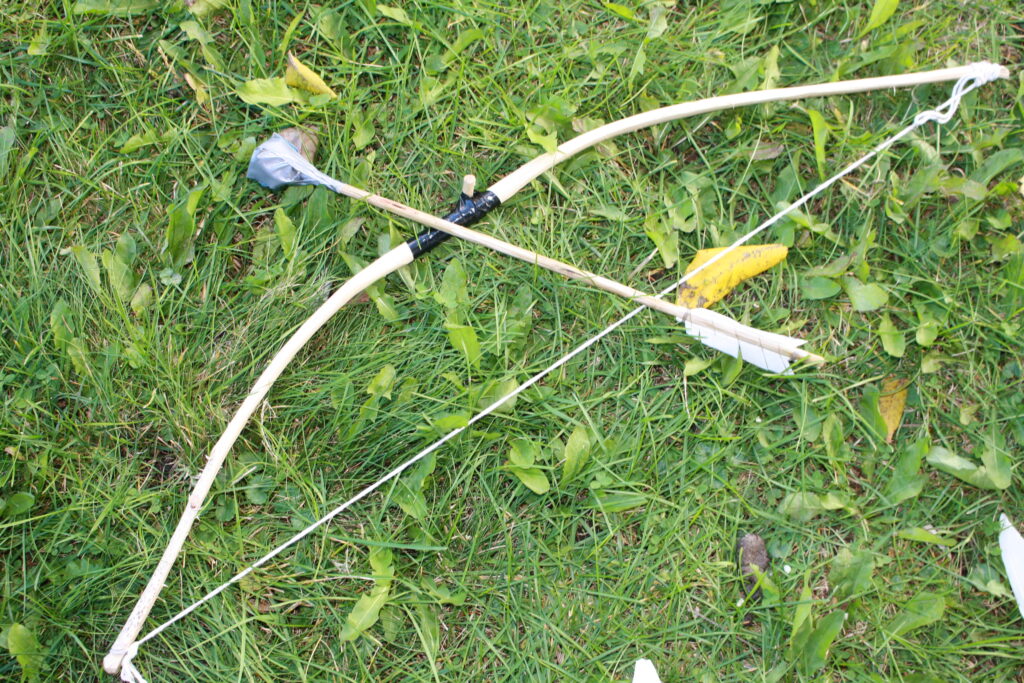
What is going to make this arrow fun is the ability to have little mock wars with it. I find the best padding material for your tip to be foam used in packaging or pool noodles as shown below. Fixed to the shaft with a couple strips of duct tape will secure it well.
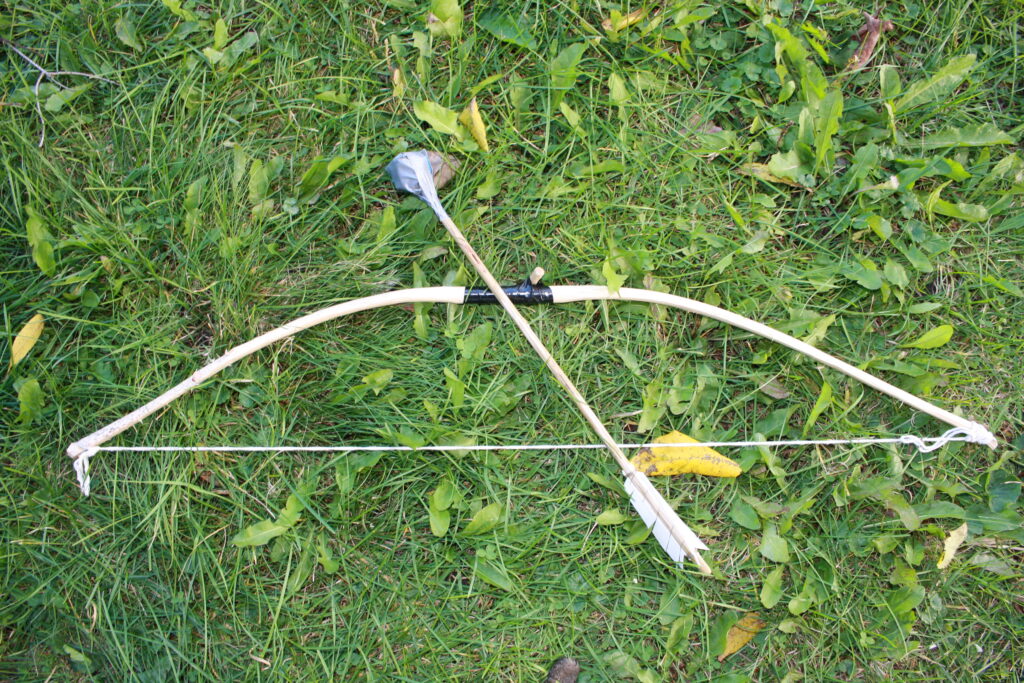
There you have it! Now you have a complete set of toy bow and arrow. It’s best to make a few more arrows, so your young archer has a good stock of ammunition. If you are unsure how the force of the arrow feels, you can, of course, test it out on someone before passing it on to your kids. I recommend your spouse.
On a post-note of interest, a child’s toy arrow from around 600 AD was found in Norway. You can read about it at Secrets of the Ice. These finds emerging from the glaciers are unique as they have been preserved for centuries where in normal conditions, natural materials such as wood, leather and fabric would have decayed away. It is offering an invaluable glimpse into folk technology of everyday use.
—Nathanael

Leave a Reply